Add-ons and OAuth
Your add-on will need to make authenticated requests to both Planning Center's API and your application's API. To do so, we make use of OAuth 2.0's "Authorization Code" Flow.
At a minimum, there will be two OAuth Providers: Planning Center and your application, as well as two OAuth applications: one you register with us here to make requests to Planning Center, and one you create in your application and configure for Planning Center in your add-on config file to make requests to your API.
Once configured, we perform the OAuth flow for both providers (Planning Center and you) when your add-on is loaded. The end result is your add-on's JavaScript code will have access to an authenticatedFetch function for making requests to Planning Center's API, and an authenticatedIntegratorFetch function for making requests to your API. More details on those functions can be found here.
Two-way OAuth Handshake
Note: Fully detailing OAuth is beyond the scope of this documentation. If you're looking for those details, here's a place to start. It's worth noting, as far as add-ons are concerned we only use the "authorization code" flow. Also, most frameworks have libraries that you can leverage for most (if not all!) of the heavy lifting.
Since, add-ons must communicate with both Planning Center's API and your API, we need a two-way OAuth handshake. For the purpose of this documentation, let's suppose your application is running at https://example.com and Planning Center is of course running at https://api.planningcenteronline.com. Let's further suppose your app has the following endpoints:
-
GET https://example.com/oauth/pco/complete-
Once the user has allowed your app to access Planning Center's API, we redirect the user here with an
authorization_code. Your server can exchange thatauthorization_codefor anaccess_tokenby POSTing tohttps://api.planningcenter.com/oauth/tokenwith that code and your client credentials. Once, you're done, you must redirect tohttps://api.planningcenteronline.com/addons/authorizations/:oauth_application_id/advance.
This is worth calling attention to as a non-standard part of the OAuth flow, but it's essential to the two-way OAuth handshake we use for add-ons. You don't have to use this exact url -- it's configurable in your config.yaml file. However, you do have to redirect to Planning Center at that exact
/advanceurl so we can begin the second leg of the two-way handshake. That's where Planning Center will request an OAuth token from you. -
-
GET https://example.com/oauth/authorize-
This is the page that prompts the user to allow Planning Center to access your API. If the user is not already logged into your system, you should do that before showing them this prompt. Generally, this prompt is a form that POSTs back to the same endpoint.
-
-
POST https://example.com/oauth/authorize-
Assuming the user allowed Planning Center to access, this endpoint creates an
authorization_codeand redirects back to Planning Center with thatauthorization_code.
-
-
POST https://example.com/oauth/token-
This is the endpoint that receives the POST request to convert the
authorization_codeinto anaccess_token. We will also use this endpoint to refresh a token if the token is about to expire. (Token expiration is optional and up to you. If there is an expiration value present, then we will refresh the token a few minutes before it expires.)
-
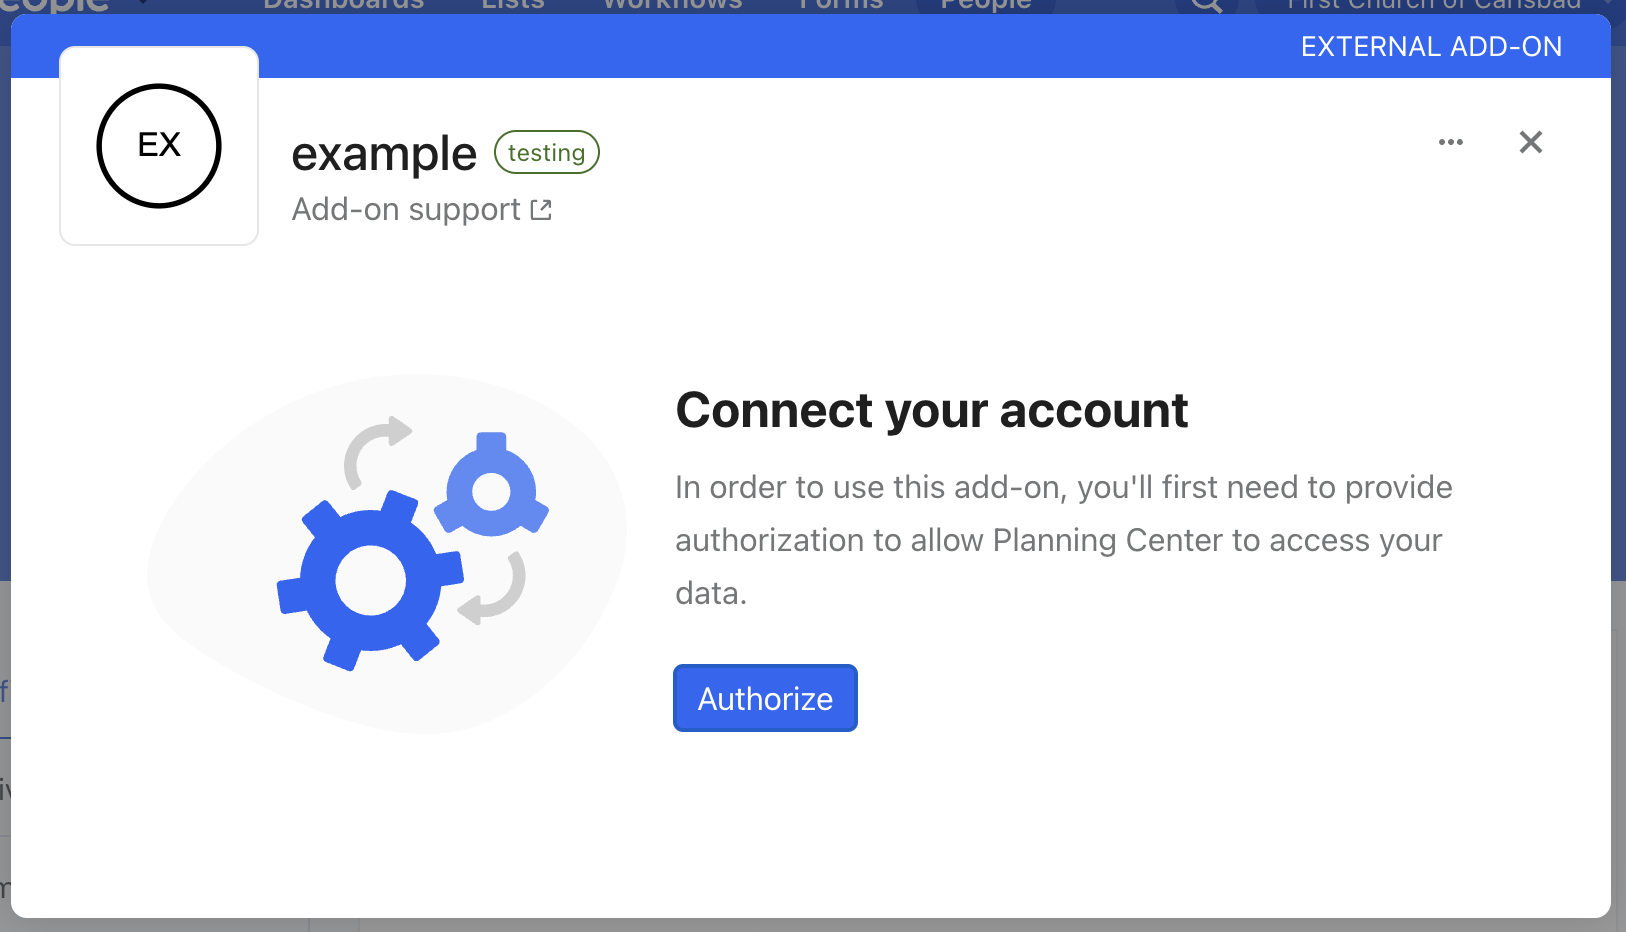
Step 0: Clicking the Authorize Button
When your add-on is first initialized, the user is presented with an "Authorize" button. Clicking it begins the two-way OAuth handshake.
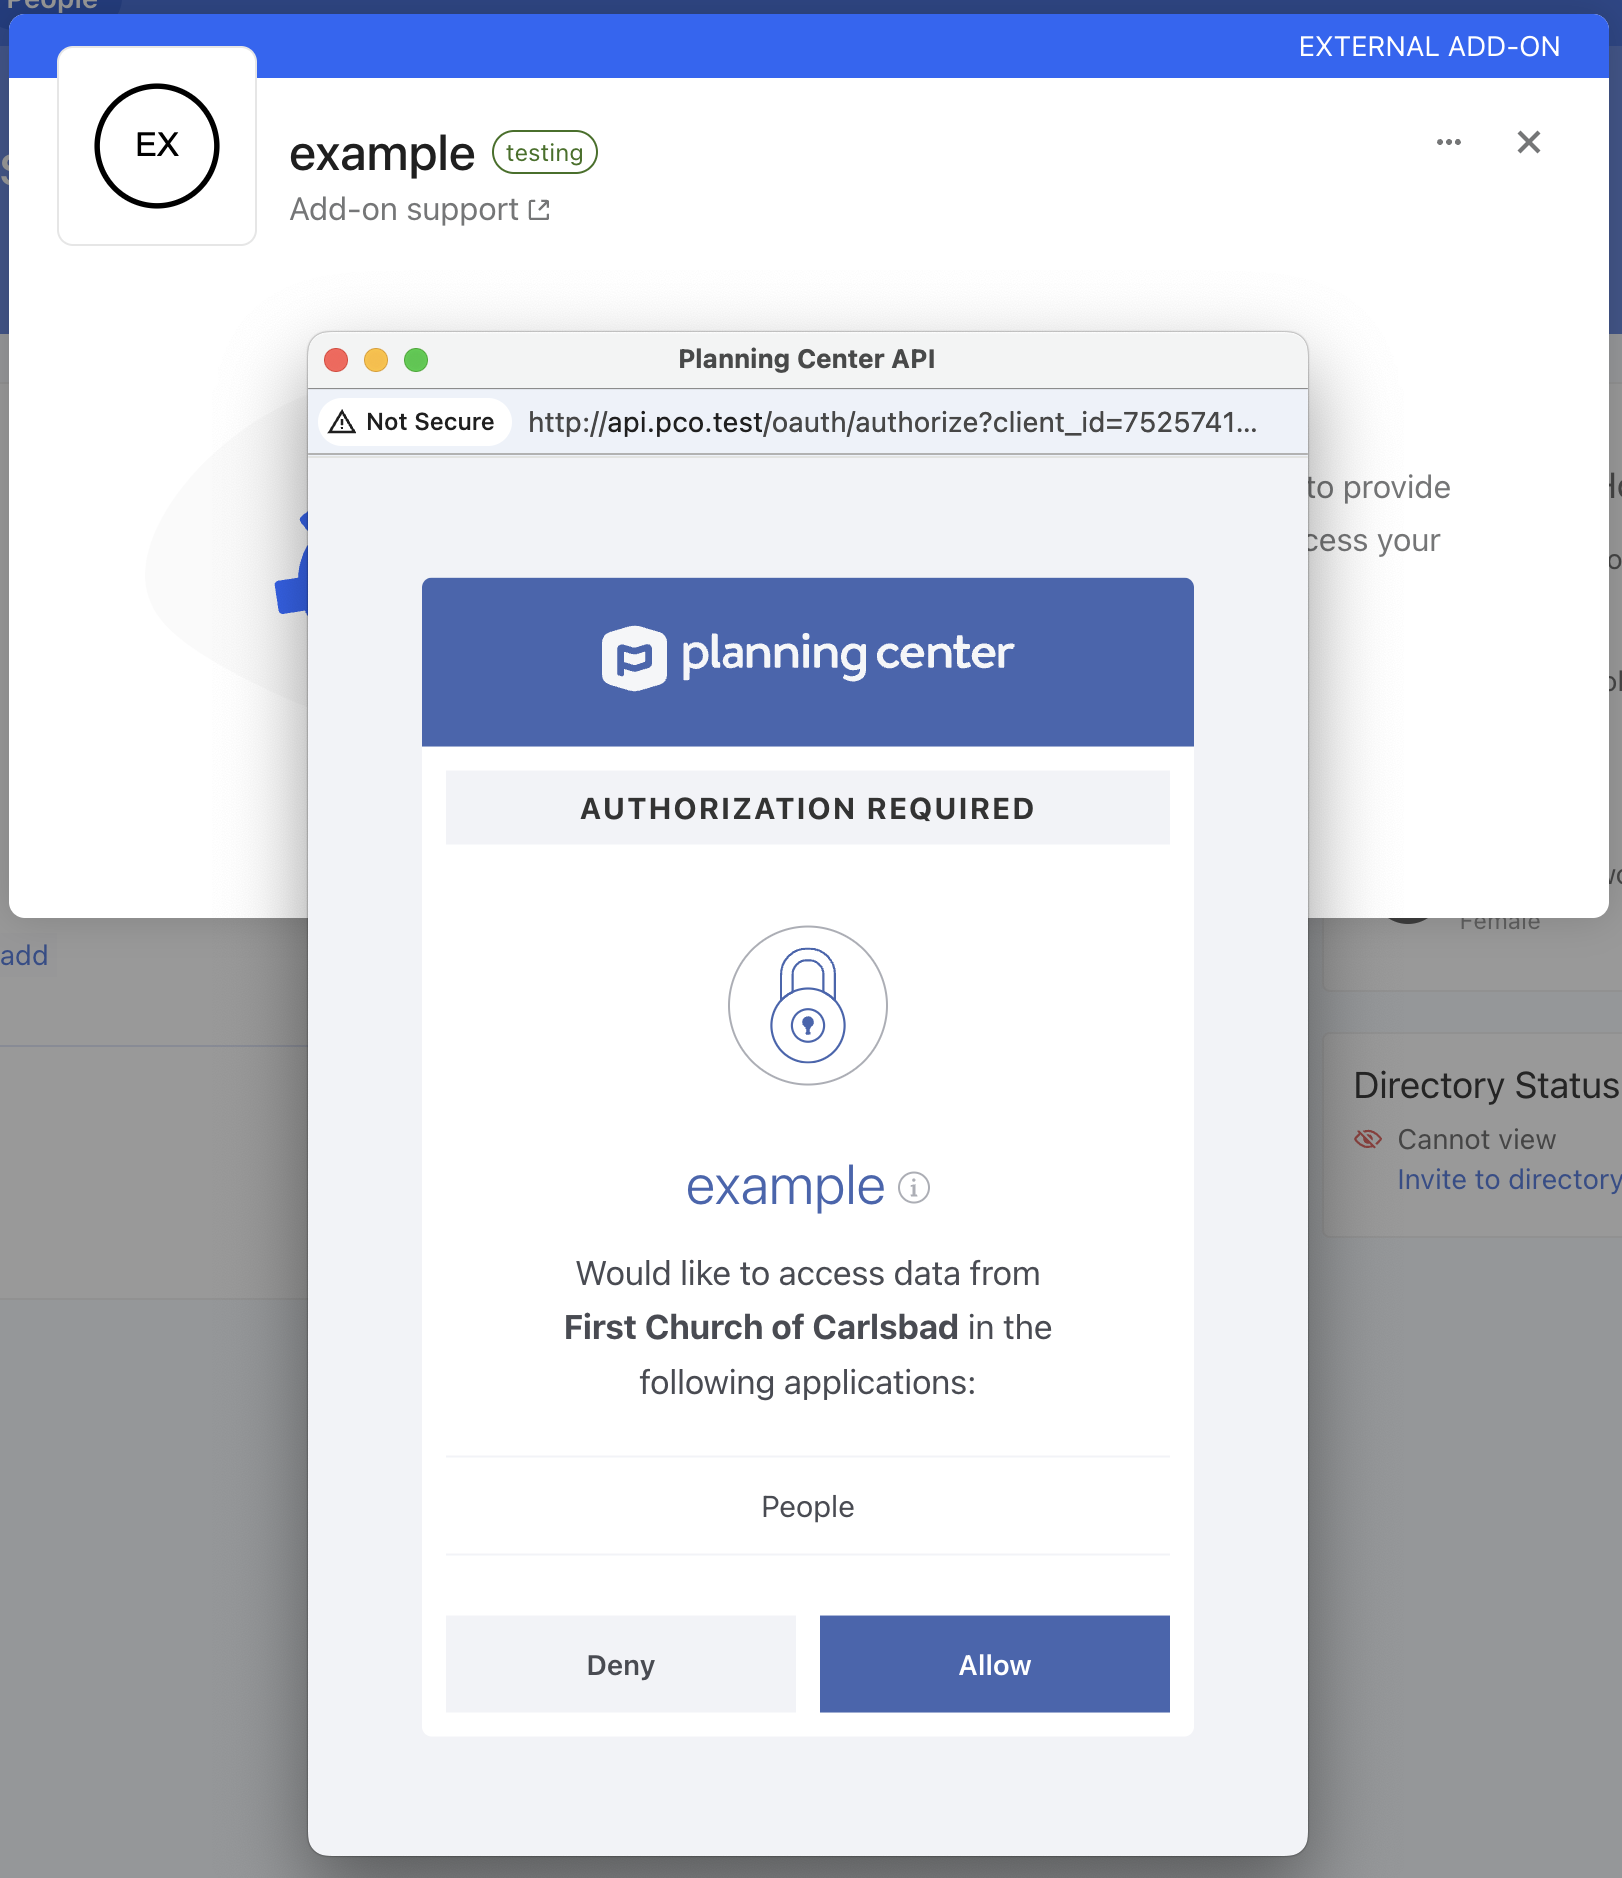
Step 1: Redirect to https://api.planningcenteronline.com/oauth/authorize
First, you get a token to Planning Center. The user is presented with an authorization prompt like this:
Step 2: Redirect to https://example.com/oauth/pco/complete
This is configurable per environment via the redirect_url in your config.yaml file.
Once the user allows your app to access Planning Center, they're redirected here. This redirect will include an authorization_code. As stated, your server can exchange that authorization_code for an access_token to Planning Center's API, but you don't have to. However, once you're done, you must redirect to https://api.planningcenteronline.com/addons/authorizations/:oauth_application_id/advance
The :oauth_application_id is an integer ID that represents your application in our system. This is not the client_id. You can find it by going to https://api.planningcenteronline.com/oauth/applications, clicking edit, and noting the ID from the URL. For example, if the URL is https://api.planningcenteronline.com/oauth/applications/42/edit, then your oauth_application_id is 42.
Step 3: Redirect to https://api.planningcenteronline.com/addons/authorizations/:oauth_application_id/advance
At this point, both you and Planning Center have an access_token that can be used to make requests to Planning Center's API. Now, we need to do the same for your API so the add-on can make requests to it. Just like the user had to allow you to access Planning Center's API, they now are given an opportunity to allow Planning Center to access your API.
Step 4: Redirect to https://example.com/oauth/authorize
This is configurable per environment via the authorize_url in your config.yaml file.
Much like Step 1, the user is presented with a prompt. What that looks like is up to you, but as an example it could look something like this:
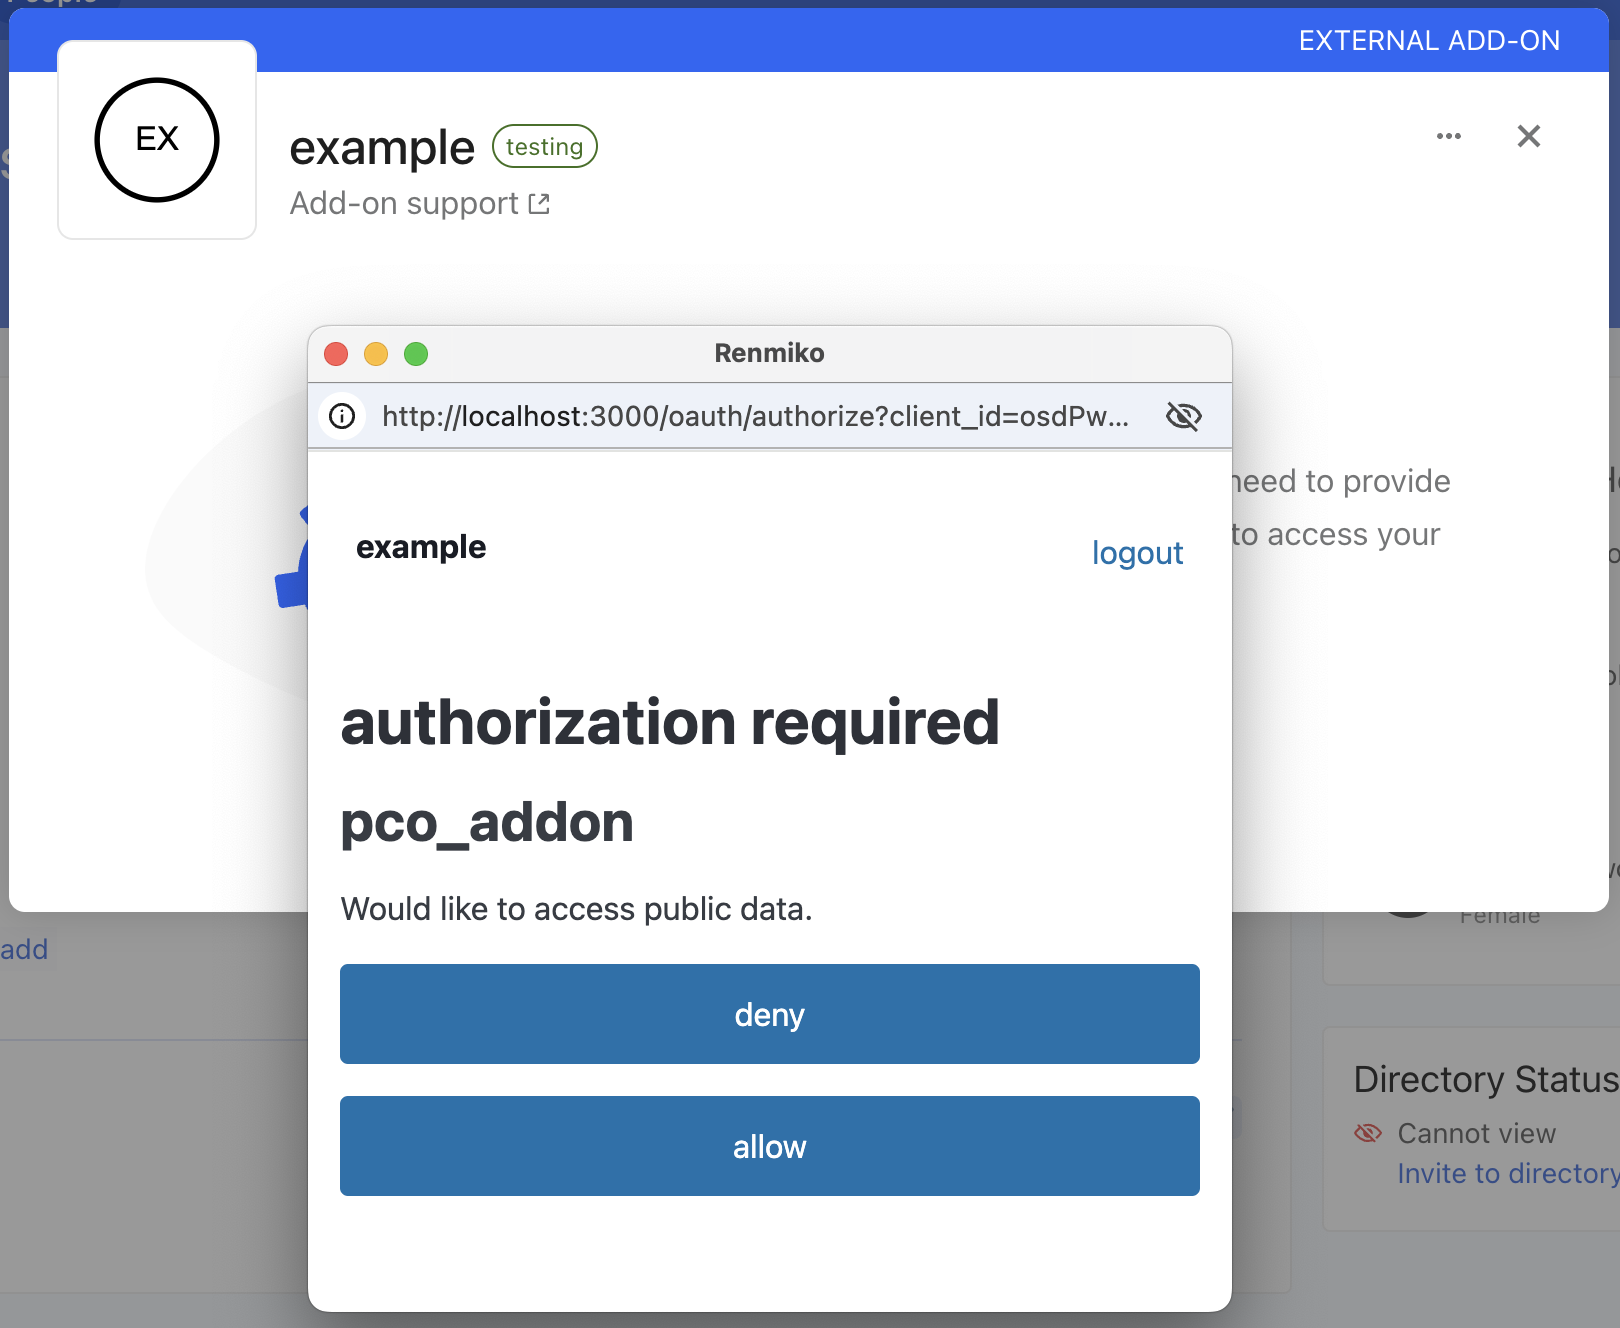
That prompt will POST back to http://example.com/oauth/authorize where your server will generate an authorization_code and send it to Planning Center by redirecting the user.
Step 5: Redirect to https://api.planningcenteronline.com/addons/authorizations/:oauth_application_id
Planning Center will POST that authorization_code and the client credentials you configure in your add-ons config.yaml, to exchange them for an access_token that can be used to make requests to your API.
Step 6: POST to https://example.com/oauth/token
This is configurable per environment via the token_url in your config.yaml file.
Your server validates the authorization_code and the client credentials, and issues an access_token.
That concludes the two-way OAuth handshake. Planning Center will close the window it used for redirecting and prompting the user, and your add-on will be ready for use!
Best Practices
Use a Library
There's little reason to implement the OAuth protocol yourself. You'll generally need to implement the OAuth protocol both from the perspective of an "OAuth Provider" (to issue access_tokens to Planning Center) and an "OAuth Client" (to request an access_token from Planning Center). Most web frameworks will have well-established libraries for both pieces. For example, in Rails we have doorkeeper for the OAuth provider piece, and the oauth2 library for the OAuth Client piece.
Create a Separate OAuth Application for Your Add-on
Many add-on authors already have an existing integration with Planning Center as a part of their offering. Don't reuse that for your add-on! Even if you have an existing OAuth application, we recommend you create a new one just for your add-on so tokens and logs are kept separate.
Don't Save access_tokens You Don't Need To
In Step 2 when we redirect to https://example.com/oauth/pco/complete, we'll include an authorization_code in that redirect you can exchange for an access_token, but you might not have to.
Even if you don't, we'll make an access_token available to your the frontend code of your add-on via the authenticatedFetch function.
You probably don't need to if you have an existing OAuth application. Your server can continue to levearge that existing integration. This is ideal because then the requests your add-on's UI makes to Planning Center are grouped separately from the requests your server makes to Planning Center in our logs, which can aid in troubleshooting.
You might not need to if your feature doesn't need Planning Center's data. For example, if you're building a texting service and all you need is a phone number, your add-on's frontend can fetch that phone number using authenticatedFetch, and pass it to your API via authenticatedIntegratorFetch.
Store Tokens Securely
When you do need to store access_tokens and refresh_tokens, you must do so securely. Remember, these all have privileged access to our shared customer's data inside Planning Center.
-
Never store the
client_secret,access_tokenorrefresh_tokenin a mobile application or on any public client. -
access_tokensandrefresh_tokenscan be stored in a secure database. When they are, they should be encrypted using a strong encryption standard such as AES. Also, avoid storing theclient_secretin the same database as therefresh_token, because compromising both allows an attacker to request newaccess_tokens. -
Never put your
client_secretin source code. Instead, use an environment variable to reference the secret in your application.
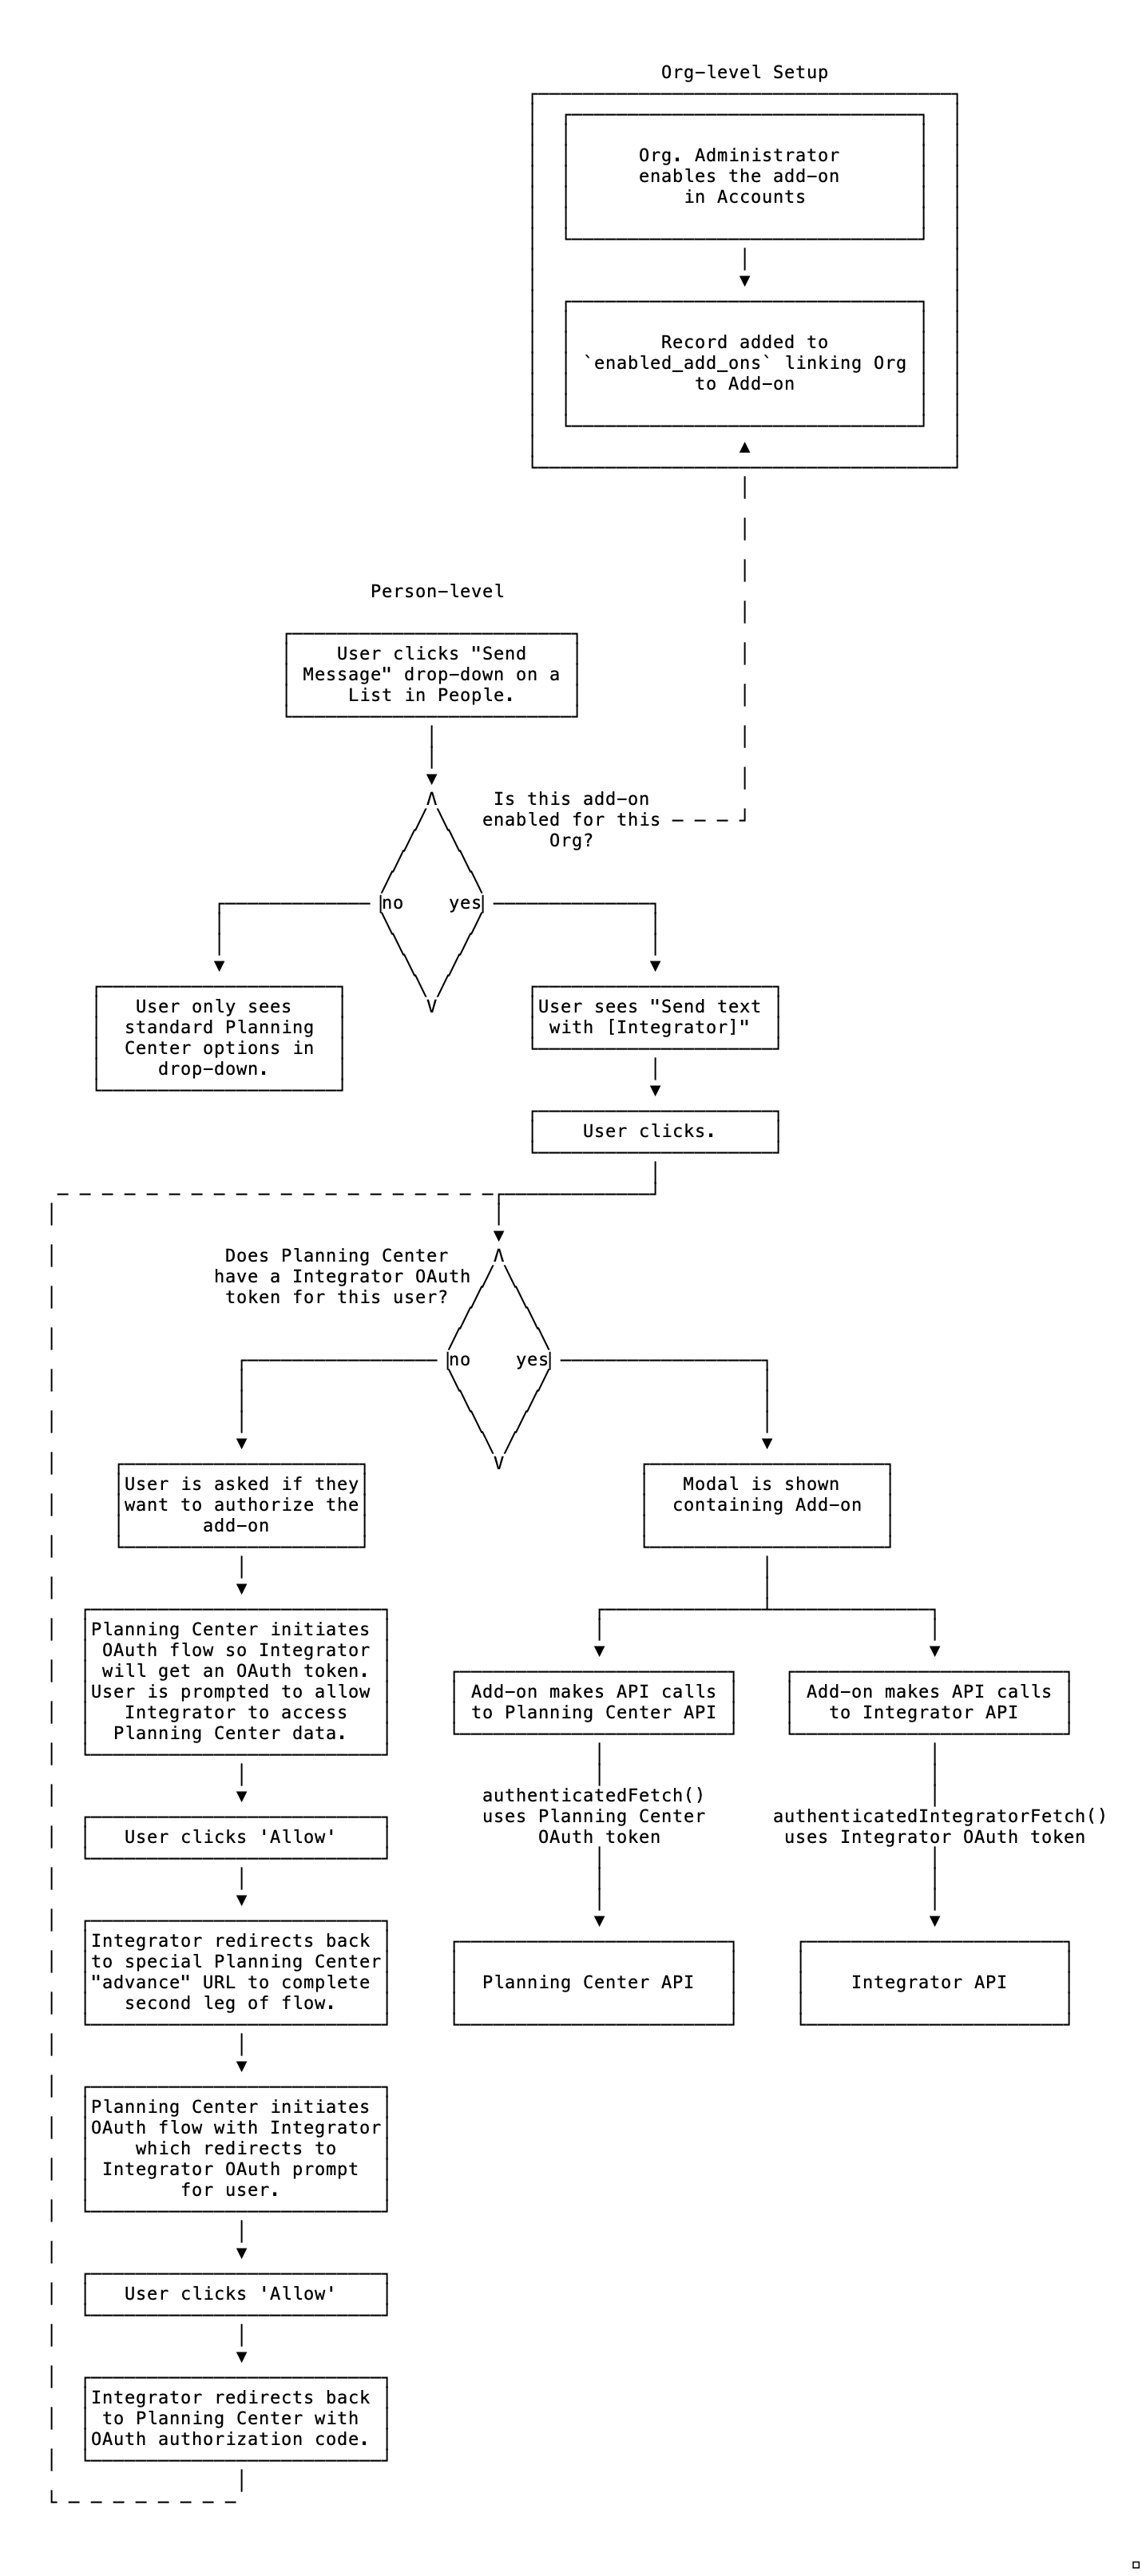
Authorization Flow
This is the general flow of activating and authorizing an add-on from with in Planning Center as a flow chart. It includes the two-way OAuth handshake, as well as what needs to happen before and after: